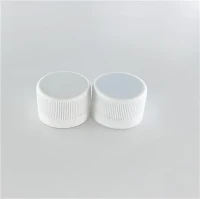
Hey there! If you're in the business of manufacturing oil caps, you know how crucial it is to have a well - functioning oil cap mould. One of the key aspects that can make or break your production process is getting the pressure of the oil cap mould just right. I'm a supplier of [Oil Cap Mould], and I've seen firsthand the impact of proper pressure adjustment on the quality and efficiency of cap production. In this blog, I'll share some tips on how to adjust the pressure of an oil cap mould.
Understanding the Importance of Pressure in Oil Cap Moulding
First things first, why is pressure so important in the oil cap moulding process? Well, the right pressure ensures that the molten plastic fills the mould cavity uniformly. This leads to consistent cap dimensions, a smooth surface finish, and proper sealing properties. If the pressure is too low, the plastic may not reach all parts of the mould, resulting in incomplete caps with thin spots or voids. On the other hand, excessive pressure can cause flash (excess plastic around the edges of the cap), damage to the mould, and even increase the stress on the cap, which can affect its durability.


Steps to Adjust the Pressure of an Oil Cap Mould
1. Start with the Manufacturer's Recommendations
The mould maker usually provides guidelines on the recommended pressure range for your specific oil cap mould. This is a great starting point. So, grab the manual and check out what they suggest. These recommendations are based on the design and material of the mould, as well as the type of plastic you'll be using. For example, if you're working with a [32 Cavity Hot Runner Oil Cap Mould], the recommended pressure might be different compared to a simpler single - cavity mould. You can find more details about [32 Cavity Hot Runner Oil Cap Mould] here: [/cap - mould/oil - cap - mould/32 - cavity - hot - runner - oil - cap - mould.html].
2. Set Up Your Moulding Machine
Before you start adjusting the pressure, make sure your moulding machine is properly set up. This includes installing the oil cap mould correctly, connecting all the necessary hoses and pipes for the injection system, and setting the temperature of the plastic barrel. Double - check the alignment of the mould halves to ensure that they close properly. A misaligned mould can cause uneven pressure distribution, even if you set the machine for the right pressure.
3. Conduct a Test Run
Once the machine is set up, perform a test run at the manufacturer's recommended pressure. Start with a small batch of caps, say 10 - 20. After the test run, inspect the caps closely. Look for any signs of under - filling or over - filling. Under - filled caps will have areas where the plastic didn't reach, while over - filled caps may have flash. If the caps look good, you're on the right track. But if you notice any issues, it's time to start adjusting the pressure.
4. Make Incremental Adjustments
If the caps are under - filled, you need to increase the pressure. But don't go overboard! Make small incremental adjustments, like 5 - 10 psi at a time. After each adjustment, run another small batch of caps and inspect them again. Keep doing this until the caps are fully formed and have a good surface finish.
Conversely, if you have flash on the caps, the pressure is too high. Decrease the pressure gradually, in the same incremental steps. It might take a few tries to find the sweet spot, but patience is key here.
5. Check for Consistency
Once you think you've found the right pressure, run a larger batch of caps, say 100 or more. This will help you confirm that the pressure setting is consistent and will produce high - quality caps over an extended period. Check the caps regularly throughout the production run to ensure that there are no changes in their quality. If you notice any issues cropping up, you may need to make further adjustments.
Factors Affecting Pressure Adjustment
1. Plastic Material
Different types of plastic have different flow properties. For example, polypropylene flows more easily than polyethylene. This means that you may need to adjust the pressure depending on the plastic you're using. You may need a higher pressure for a plastic with lower flowability to ensure it fills the mould cavity completely. Discuss with your plastic supplier to get a better understanding of the optimal processing conditions for the specific plastic grade you're using.
2. Mould Design
The design of the oil cap mould can also impact the pressure requirements. A mould with complex features, such as multiple ribs or a thin - walled design, may require higher pressure to fill properly. Additionally, the size and shape of the cap can affect the flow of the plastic. Larger caps may need more pressure to ensure that the plastic reaches all corners of the mould. Check out our [Oil Bottle Lid Mould] here: [/cap - mould/oil - cap - mould/oil - bottle - lid - mould.html] for more on different mould designs.
3. Temperature
The temperature of the plastic and the mould can also affect the pressure. If the plastic is too cold, it will be more viscous and may require higher pressure to flow. On the other hand, if the plastic is too hot, it may flow too easily and cause flash. Make sure to maintain the recommended temperature ranges for both the plastic and the mould throughout the production process.
Fine - Tuning for Different Mould Cavities
If you're using a multi - cavity oil cap mould, such as the [32 Cavity Hot Runner Oil Cap Mould], you may encounter some differences in the quality of the caps from different cavities. This can be due to variations in the flow path of the plastic or slight differences in the mould cavity dimensions. To address this, you may need to fine - tune the pressure for each cavity individually.
Some advanced moulding machines come with features that allow you to control the pressure in each cavity separately. If your machine doesn't have this feature, you can try adjusting the sprue or runner dimensions for each cavity to balance the flow of plastic. This may require some trial and error, but it can significantly improve the consistency of your cap production.
Conclusion
Adjusting the pressure of an oil cap mould is a crucial step in ensuring high - quality cap production. By starting with the manufacturer's recommendations, making incremental adjustments, and considering factors like plastic material, mould design, and temperature, you can find the optimal pressure for your specific moulding process.
If you're looking for high - quality oil cap moulds, we've got you covered. We also offer [Bottle Lids Mold] for all your bottle cap manufacturing needs. You can find more information about [Bottle Lids Mold] here: [/cap - mould/oil - cap - mould/bottle - lids - mold.html].
If you're interested in purchasing our oil cap moulds or have any questions about pressure adjustment or other mould - related issues, don't hesitate to contact us for a procurement discussion. We're always happy to help you out and find the best solutions for your manufacturing needs.
References
- Injection Moulding: Principles and Practice by Miles A.-s. Dewey
- Handbook of Plastic Molding Design and Processing by Mohamed A. El - Maraghy