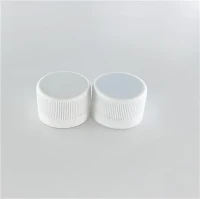
Hey there! I'm a supplier of virus tube cap moulds, and today I'm gonna share with you how to operate a virus tube cap mould. It's not as complicated as it might seem at first glance, but there are definitely some key steps and things to keep in mind.
1. Preparation Before Operation
First off, you gotta make sure your work area is clean and tidy. Any dust or debris can mess up the moulding process and lead to defective caps. Check the mould itself for any signs of damage or wear. Look for cracks, scratches, or any parts that might be loose. If you find anything wrong, it's better to fix it before you start.
Next, gather all the necessary materials. You'll need the right type of plastic resin for making the virus tube caps. Usually, polypropylene (PP) is a popular choice because it's durable, has good chemical resistance, and is easy to mould. Also, make sure you have the proper lubricants and release agents on hand. These will help the caps come out of the mould smoothly.
2. Mould Installation
Once you've got everything ready, it's time to install the virus tube cap mould into the injection moulding machine. This step requires a bit of care. First, align the mould with the machine's platens. You want to make sure it's centered and properly seated. Use the right tools to tighten the bolts and secure the mould in place. But don't over - tighten them, as this can damage the mould or the machine.
After the mould is installed, connect the cooling system. The cooling system is crucial because it helps to solidify the plastic quickly and evenly, which affects the quality of the caps. Make sure all the hoses are properly connected and there are no leaks.
3. Machine Setup
Now, let's set up the injection moulding machine. Start by adjusting the temperature settings. The temperature of the plastic barrel should be set according to the type of plastic resin you're using. For PP, the temperature usually ranges from 180°C to 220°C. You can refer to the resin manufacturer's guidelines for the exact temperature.
Next, set the injection pressure and speed. The pressure should be high enough to fill the mould cavity completely, but not so high that it causes flash (excess plastic around the edges of the cap). The injection speed also affects the filling process. A too - slow speed might result in incomplete filling, while a too - fast speed can cause air bubbles to form in the caps.
You also need to set the clamping force. This is the force that holds the two halves of the mould together during the injection process. It should be sufficient to prevent the mould from opening under the pressure of the injected plastic.
4. Material Feeding
Once the machine is set up, it's time to feed the plastic resin into the machine. Pour the resin into the hopper of the injection moulding machine. Make sure the resin is dry, as moisture can cause defects in the caps. If necessary, you can use a dryer to remove any moisture from the resin before feeding it into the machine.
As the resin is fed into the barrel, it gets melted by the heat. The screw inside the barrel then pushes the molten plastic towards the nozzle. This process is called plasticizing.


5. Injection Process
When the plastic is properly melted and plasticized, the injection process starts. The machine pushes the molten plastic through the nozzle and into the mould cavity. The plastic fills the cavity, taking the shape of the virus tube cap.
During the injection, keep an eye on the process. Watch for any signs of abnormal pressure, such as sudden spikes or drops. Also, check if the plastic is flowing evenly into all parts of the mould. If you notice any issues, you may need to adjust the injection pressure or speed.
6. Cooling and Ejection
After the mould cavity is filled with plastic, the cooling process begins. As I mentioned earlier, the cooling system helps to lower the temperature of the plastic, allowing it to solidify. The cooling time is an important factor. If it's too short, the caps may deform when they are ejected from the mould. If it's too long, it will reduce the production efficiency.
Once the plastic has solidified, the mould opens, and the caps are ejected. You can use ejector pins or other ejection mechanisms to push the caps out of the mould. Make sure the ejection process is smooth and doesn't damage the caps.
7. Quality Inspection
After the caps are ejected, it's time to inspect them for quality. Check the caps for any visible defects, such as cracks, bubbles, or flash. Measure the dimensions of the caps to make sure they meet the specifications. If you find any defective caps, separate them from the good ones. Analyze the cause of the defects so that you can take corrective actions in the next production cycle.
8. Maintenance and Cleaning
After a batch of production is completed, it's important to clean and maintain the virus tube cap mould. First, remove any remaining plastic from the mould using a soft brush or a cleaning solvent. Make sure to clean all the cavities, vents, and runners.
Lubricate the moving parts of the mould, such as the ejector pins and slides. This will keep them working smoothly and prevent wear. Also, check the mould for any signs of damage or wear again, and perform any necessary repairs or replacements.
If you're interested in high - quality virus tube cap moulds, we've got a great selection. For example, our Medical PP Injection Blood Collection Tube Mold is designed to produce durable and precise blood collection tube caps. We also offer Custom Bottle Caps Mold for those who have specific requirements. And our Medical Plastic Test Tubes Screw Cap Mould is ideal for making screw caps for test tubes.
If you're looking to purchase virus tube cap moulds or have any questions about the operation or our products, don't hesitate to get in touch for procurement and negotiation. We're here to help you with all your moulding needs.
References
- Injection Moulding Handbook, by Rosato and Rosato
- Plastics Engineering, various issues