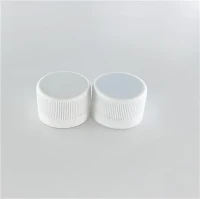
Storing an oil cap mould properly is crucial for any business in the mould manufacturing industry, especially for suppliers like me. As an Oil Cap Mould supplier, I've learned through years of experience that proper storage can significantly extend the lifespan of these valuable tools and ensure consistent product quality. In this blog, I'll share some practical tips on how to store an oil cap mould properly.
Clean the Mould Thoroughly
Before storing an oil cap mould, the first and most important step is to clean it thoroughly. Residues from the manufacturing process, such as plastic particles, lubricants, and other contaminants, can cause corrosion and damage to the mould over time. Use a suitable cleaning agent and soft brushes to remove all the dirt and debris from the mould surface. Pay special attention to the cavities, cores, and any intricate details of the mould, as these areas are more likely to trap residues.
For example, if you've been using the 20L Oil Cap Mould to produce large oil caps, make sure to clean every nook and cranny of the mould. A clean mould not only reduces the risk of corrosion but also makes it easier to inspect for any signs of wear or damage.
Inspect for Damage
Once the mould is clean, conduct a thorough inspection for any signs of damage. Look for cracks, chips, or any other defects that could affect the performance of the mould. Minor damages can often be repaired before storage, preventing further deterioration. Check the moving parts of the mould, such as slides and ejectors, to ensure they are in good working condition.
If you find any significant damage, it's advisable to consult with a professional mould repair service. For instance, if the Oil Bottle Cap Mould has a damaged core, getting it repaired promptly can save you from costly replacements in the future.
Apply a Protective Coating
After cleaning and inspecting the mould, apply a protective coating to prevent corrosion. There are various types of protective coatings available in the market, such as anti - rust sprays and lubricating oils. Choose a coating that is suitable for the material of your mould. For steel moulds, a high - quality anti - rust spray can provide excellent protection.
Make sure to apply the coating evenly on all surfaces of the mould, including the cavities, cores, and the outer surface. This protective layer acts as a barrier between the mould and the environment, preventing moisture and oxygen from causing corrosion.
Choose the Right Storage Location
The storage location plays a vital role in the proper preservation of an oil cap mould. The ideal storage area should be dry, clean, and well - ventilated. Avoid storing the mould in areas prone to humidity, such as basements or near water sources. High humidity can lead to rust and corrosion, which can severely damage the mould.
A temperature - controlled environment is also beneficial. Extreme temperature fluctuations can cause the mould to expand and contract, leading to stress and potential damage. If possible, store the mould in a dedicated storage room with a stable temperature and humidity level.
Use Proper Storage Equipment
Invest in proper storage equipment to keep the oil cap mould safe. Shelving units made of sturdy materials can be used to store the moulds. Make sure the shelves are strong enough to support the weight of the mould. You can also use mould storage racks that are specifically designed to hold moulds in an upright position, which helps prevent warping.
For smaller moulds like the 8 Cavity Oil Cap Mould, you can use plastic storage containers to protect them from dust and other contaminants. Label the storage containers clearly with the details of the mould, such as its size, type, and production history.
Organize the Moulds
Proper organization of the moulds in the storage area is essential. Create a system to keep track of all the moulds, such as a database or a spreadsheet. Include information like the mould's dimensions, production date, and last usage. This makes it easier to locate the mould when needed and also helps in planning for maintenance and replacement.
Arrange the moulds in an orderly manner on the shelves or racks. Group similar moulds together, for example, all the oil bottle cap moulds in one section and the large oil cap moulds in another. This not only makes the storage area more organized but also improves efficiency when retrieving the moulds.
Regularly Check the Stored Moulds
Even when the moulds are in storage, it's important to conduct regular checks. Inspect the moulds every few months to ensure that the protective coating is still intact and that there are no signs of damage or corrosion. If you notice any issues, take immediate action to address them.
During the inspection, you can also clean the moulds lightly to remove any dust that may have accumulated. This simple maintenance routine can go a long way in keeping the moulds in good condition for an extended period.
Conclusion
Properly storing an oil cap mould is essential for maintaining its quality and extending its lifespan. By following these steps - cleaning, inspecting, applying a protective coating, choosing the right storage location, using proper storage equipment, organizing the moulds, and regularly checking them - you can ensure that your oil cap moulds are always in top - notch condition.


As an Oil Cap Mould supplier, I understand the importance of providing high - quality moulds to my customers. If you're in the market for oil cap moulds or need advice on mould storage, don't hesitate to reach out. We're here to help you make the best decisions for your business.
References
- "Mould Maintenance and Storage Guide", Industry Handbook, 20XX
- "Best Practices for Mould Storage", Manufacturing Magazine, 20XX