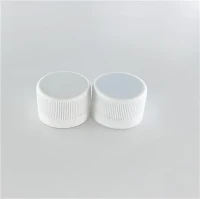
Troubleshooting a 16 Cavity Oil Cap Mould when it malfunctions is a crucial skill for any manufacturer or supplier in the plastic molding industry. As a supplier of 16 Cavity Oil Cap Moulds, I understand the importance of quickly identifying and resolving issues to minimize downtime and ensure the production of high - quality oil caps. In this blog post, I will share some common malfunctions that can occur with a 16 Cavity Oil Cap Mould and how to troubleshoot them effectively.
Common Malfunctions and Their Causes
1. Short Shots
Short shots occur when the molten plastic does not completely fill the mold cavities, resulting in incomplete oil caps. This can be caused by several factors:
- Insufficient Injection Pressure: If the injection pressure is too low, the plastic may not be able to flow all the way into the cavities. Check the injection pressure settings on your molding machine and adjust them according to the mold's requirements.
- Clogged Gates or Runners: Gates and runners are the channels through which the plastic flows into the cavities. If they are clogged with solidified plastic or debris, it can restrict the flow and cause short shots. Inspect the gates and runners regularly and clean them if necessary.
- Incorrect Melt Temperature: If the melt temperature is too low, the plastic will be too viscous to flow easily. On the other hand, if it is too high, the plastic may degrade. Make sure to set the melt temperature within the recommended range for the plastic material being used.
2. Flash
Flash is the excess plastic that seeps out of the mold cavities and forms thin, unwanted edges on the oil caps. This can be due to:
- Improper Mold Clamping Force: If the mold clamping force is not sufficient, the mold halves may not be held together tightly enough, allowing plastic to escape. Increase the clamping force to prevent flash.
- Worn or Damaged Mold Components: Over time, the mold components such as the parting line, inserts, or ejector pins can wear out or get damaged. This can create gaps through which the plastic can leak. Inspect the mold components regularly and replace any worn or damaged parts.
- Excessive Injection Volume: Injecting too much plastic into the mold can also cause flash. Check the injection volume settings and adjust them to the appropriate level.
3. Warping
Warping occurs when the oil caps deform after being ejected from the mold. This can be caused by:
- Uneven Cooling: If the cooling process is not uniform, different parts of the oil cap will cool at different rates, leading to internal stresses and warping. Make sure the cooling channels in the mold are clean and unobstructed, and that the coolant flow rate is consistent.
- Incorrect Ejection System: If the ejector pins are not properly positioned or if they apply uneven force during ejection, it can cause the oil cap to warp. Check the ejector system and make sure it is functioning correctly.
- Residual Stresses in the Plastic: Some plastic materials may have residual stresses due to the molding process. Annealing the oil caps after molding can help relieve these stresses and reduce warping.
4. Surface Defects
Surface defects such as sink marks, voids, or burn marks can affect the appearance and quality of the oil caps. These can be caused by:
- Inadequate Packing Pressure: Packing pressure is applied after the initial injection to ensure that the mold cavities are fully filled and that the plastic is compacted. If the packing pressure is too low, sink marks or voids may occur. Increase the packing pressure to eliminate these defects.
- Air Traps: Air can get trapped in the mold cavities during the injection process, causing voids or burn marks. Make sure the mold has proper venting to allow the air to escape.
- Contaminated Plastic Material: Contaminated plastic material can cause surface defects. Make sure to use clean and high - quality plastic material and store it properly to prevent contamination.
Troubleshooting Steps
Step 1: Visual Inspection
The first step in troubleshooting a malfunctioning 16 Cavity Oil Cap Mould is to conduct a visual inspection. Look for any obvious signs of damage, such as cracks, wear, or clogging in the mold components, gates, runners, and cooling channels. Check the oil caps for any visible defects such as short shots, flash, warping, or surface defects.
Step 2: Check the Molding Machine Settings
Review the molding machine settings, including injection pressure, injection volume, melt temperature, clamping force, and cooling time. Compare these settings with the mold's specifications and make any necessary adjustments.
Step 3: Clean the Mold
Clean the mold thoroughly to remove any debris, solidified plastic, or contaminants. Use appropriate cleaning tools and solvents, and make sure to follow the safety guidelines. Pay special attention to the gates, runners, and cooling channels.
Step 4: Inspect and Replace Worn or Damaged Parts
Inspect all the mold components, including the parting line, inserts, ejector pins, and cooling channels. Replace any worn or damaged parts to ensure the proper functioning of the mold.


Step 5: Conduct Test Runs
After making the necessary adjustments and repairs, conduct test runs to check if the problem has been resolved. Monitor the quality of the oil caps produced during the test runs and make further adjustments if needed.
Preventive Maintenance
Preventive maintenance is key to minimizing malfunctions and ensuring the long - term performance of a 16 Cavity Oil Cap Mould. Here are some preventive maintenance tips:
- Regular Cleaning and Lubrication: Clean the mold regularly to prevent the buildup of debris and contaminants. Lubricate the moving parts such as the ejector pins and guide pins to reduce friction and wear.
- Inspection and Calibration: Conduct regular inspections of the mold components to detect any signs of wear or damage early. Calibrate the molding machine regularly to ensure accurate and consistent operation.
- Proper Storage: Store the mold in a clean and dry environment to prevent corrosion and damage. Use protective covers to keep the mold safe when it is not in use.
Conclusion
Troubleshooting a 16 Cavity Oil Cap Mould when it malfunctions requires a systematic approach and a good understanding of the molding process. By identifying the common malfunctions, their causes, and following the appropriate troubleshooting steps, you can quickly resolve issues and minimize downtime. As a supplier of 16 Cavity Oil Cap Moulds, we are committed to providing high - quality molds and excellent after - sales support. If you are looking for a reliable 16 Cavity Oil Cap Mould, or if you are interested in our other products such as the 24 Cavities Cooking Oil Cap Mould or the 32 Cavity Hot Runner Oil Cap Mould, or even the Oil Bottle Lid Mould, please feel free to contact us for more information and to discuss your specific requirements. We look forward to working with you to meet your molding needs.
References
- "Plastic Injection Molding Handbook" by Dominick V. Rosato and Donald V. Rosato
- "Mold Design Handbook" by Peter F. Upton
- Industry publications and technical resources related to plastic molding technology.